Hacking the Jeep Interior CAN-Bus
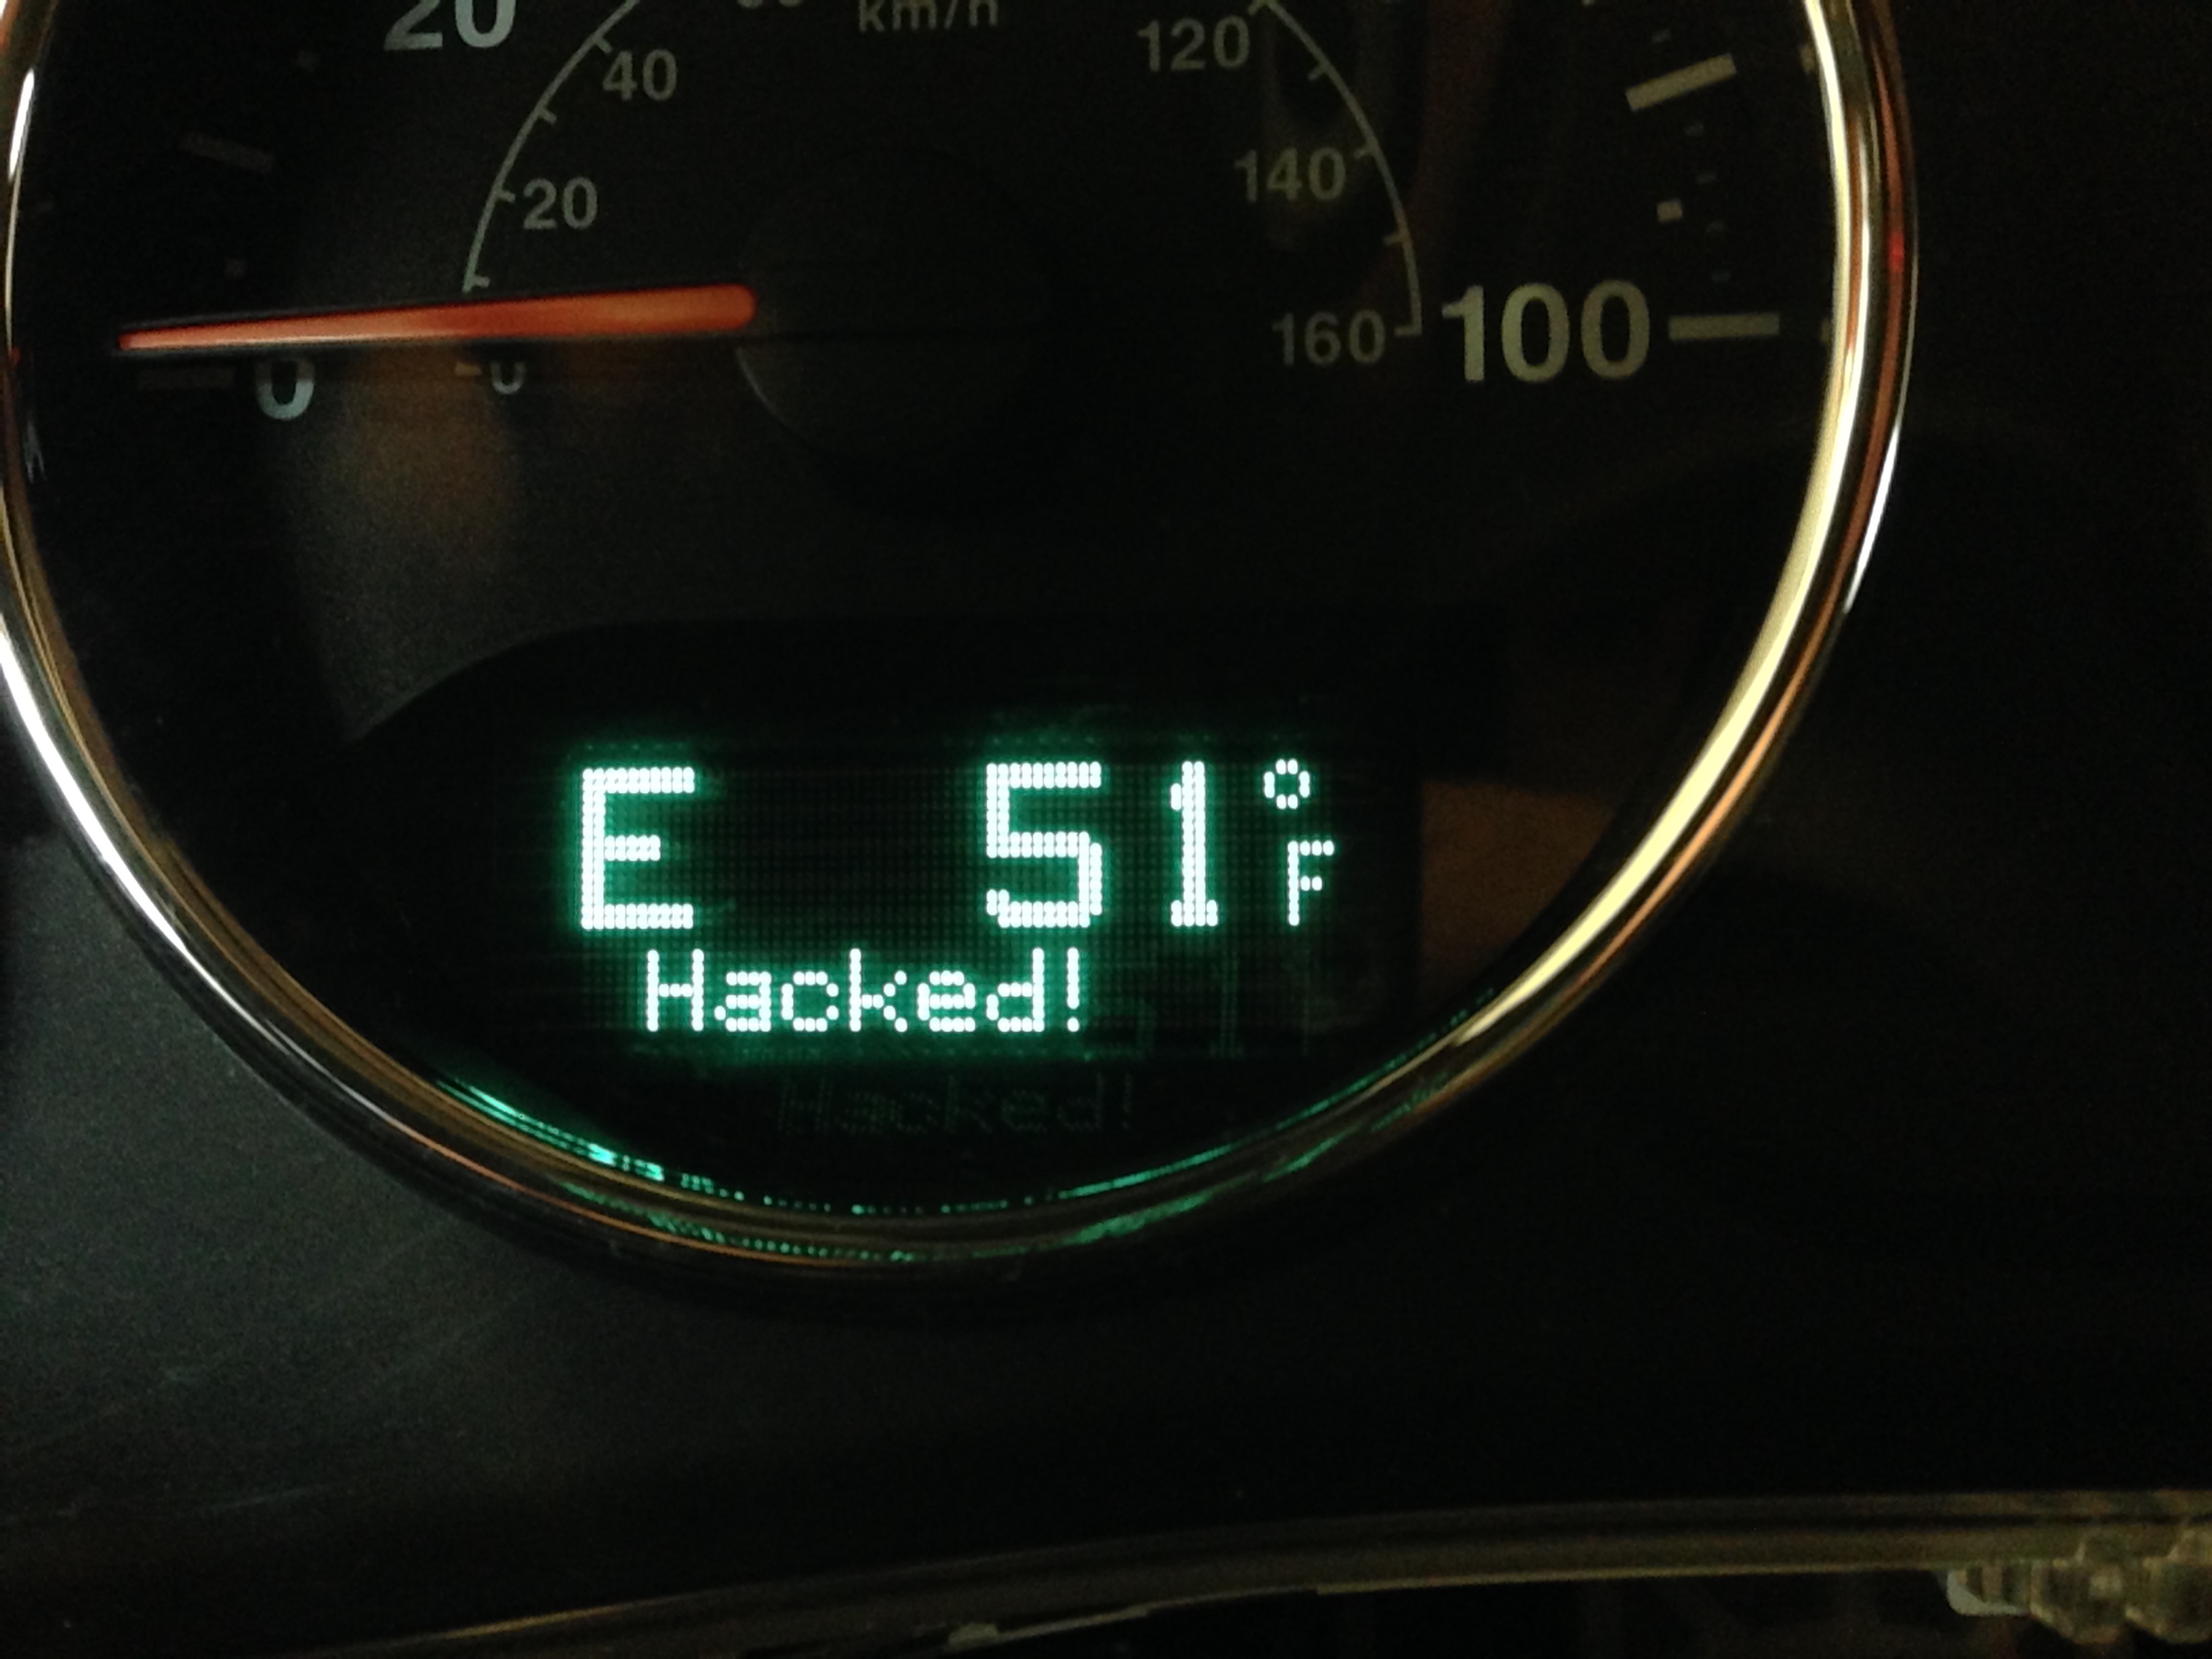 The Jeep’s Electronic Vehicle Information Center (EVIC) Displays a Custom Message
I have a 2012 Jeep Wrangler Unlimited and have a few projects where I wanted to integrate closely with the vehicle’s electronics. Instead of tapping into the final wiring of the car, I wanted to leverage the vehicle’s own computers to tell my accessories what to do. The end goal being a much tighter and seamless integration, and much less modification to the wiring of the vehicle.
Modern automobiles use a technology called a Controller Area Network, or CAN-Bus, to communicate between the different computers within the vehicle. The use of this technology greatly simplifies the wiring requirements within the vehicle as a large number of components can share a single twisted-pair wiring harness.
There are actually three separate CAN bus systems used in the vehicle: the CAN-Interior (also known as CAN Interior High Speed/IHS), the CAN-C and the Diagnostic CAN-C. The CAN-Interior bus is used for communication between the interior modules of the vehicle, such as the dashboard and radio and runs at 125 Kbps. The CAN-C bus is used by the power train components and runs at 500 Kbps. Finally, there is the Diagnostic CAN-C which also runs at 500 Kbps.
The Diagnostic CAN-C bus is used to talk to a gateway computer, the Totally Integrated Power Module or TIPM. This gateway implements all of the logic needed for onboard diagnostics, and communicates to the other two buses as needed. One effect of this implementation is that data from the other buses is not easily obtained via the data link connector (a.k.a the ODB-II port) underneath the dash. While a tremendous amount of information is available via the diagnostic bus, it isn’t easy to hack or obtain without getting official documentation from the manufacturer directly.
I came across canbushack.com when I was thinking about looking at the CAN-interior bus and was happy to see much of the information I was after is on that bus. Unfortunately, I also found that the implementation has changed quite a bit from the time most of the work was done on that site versus what is in my Jeep today.
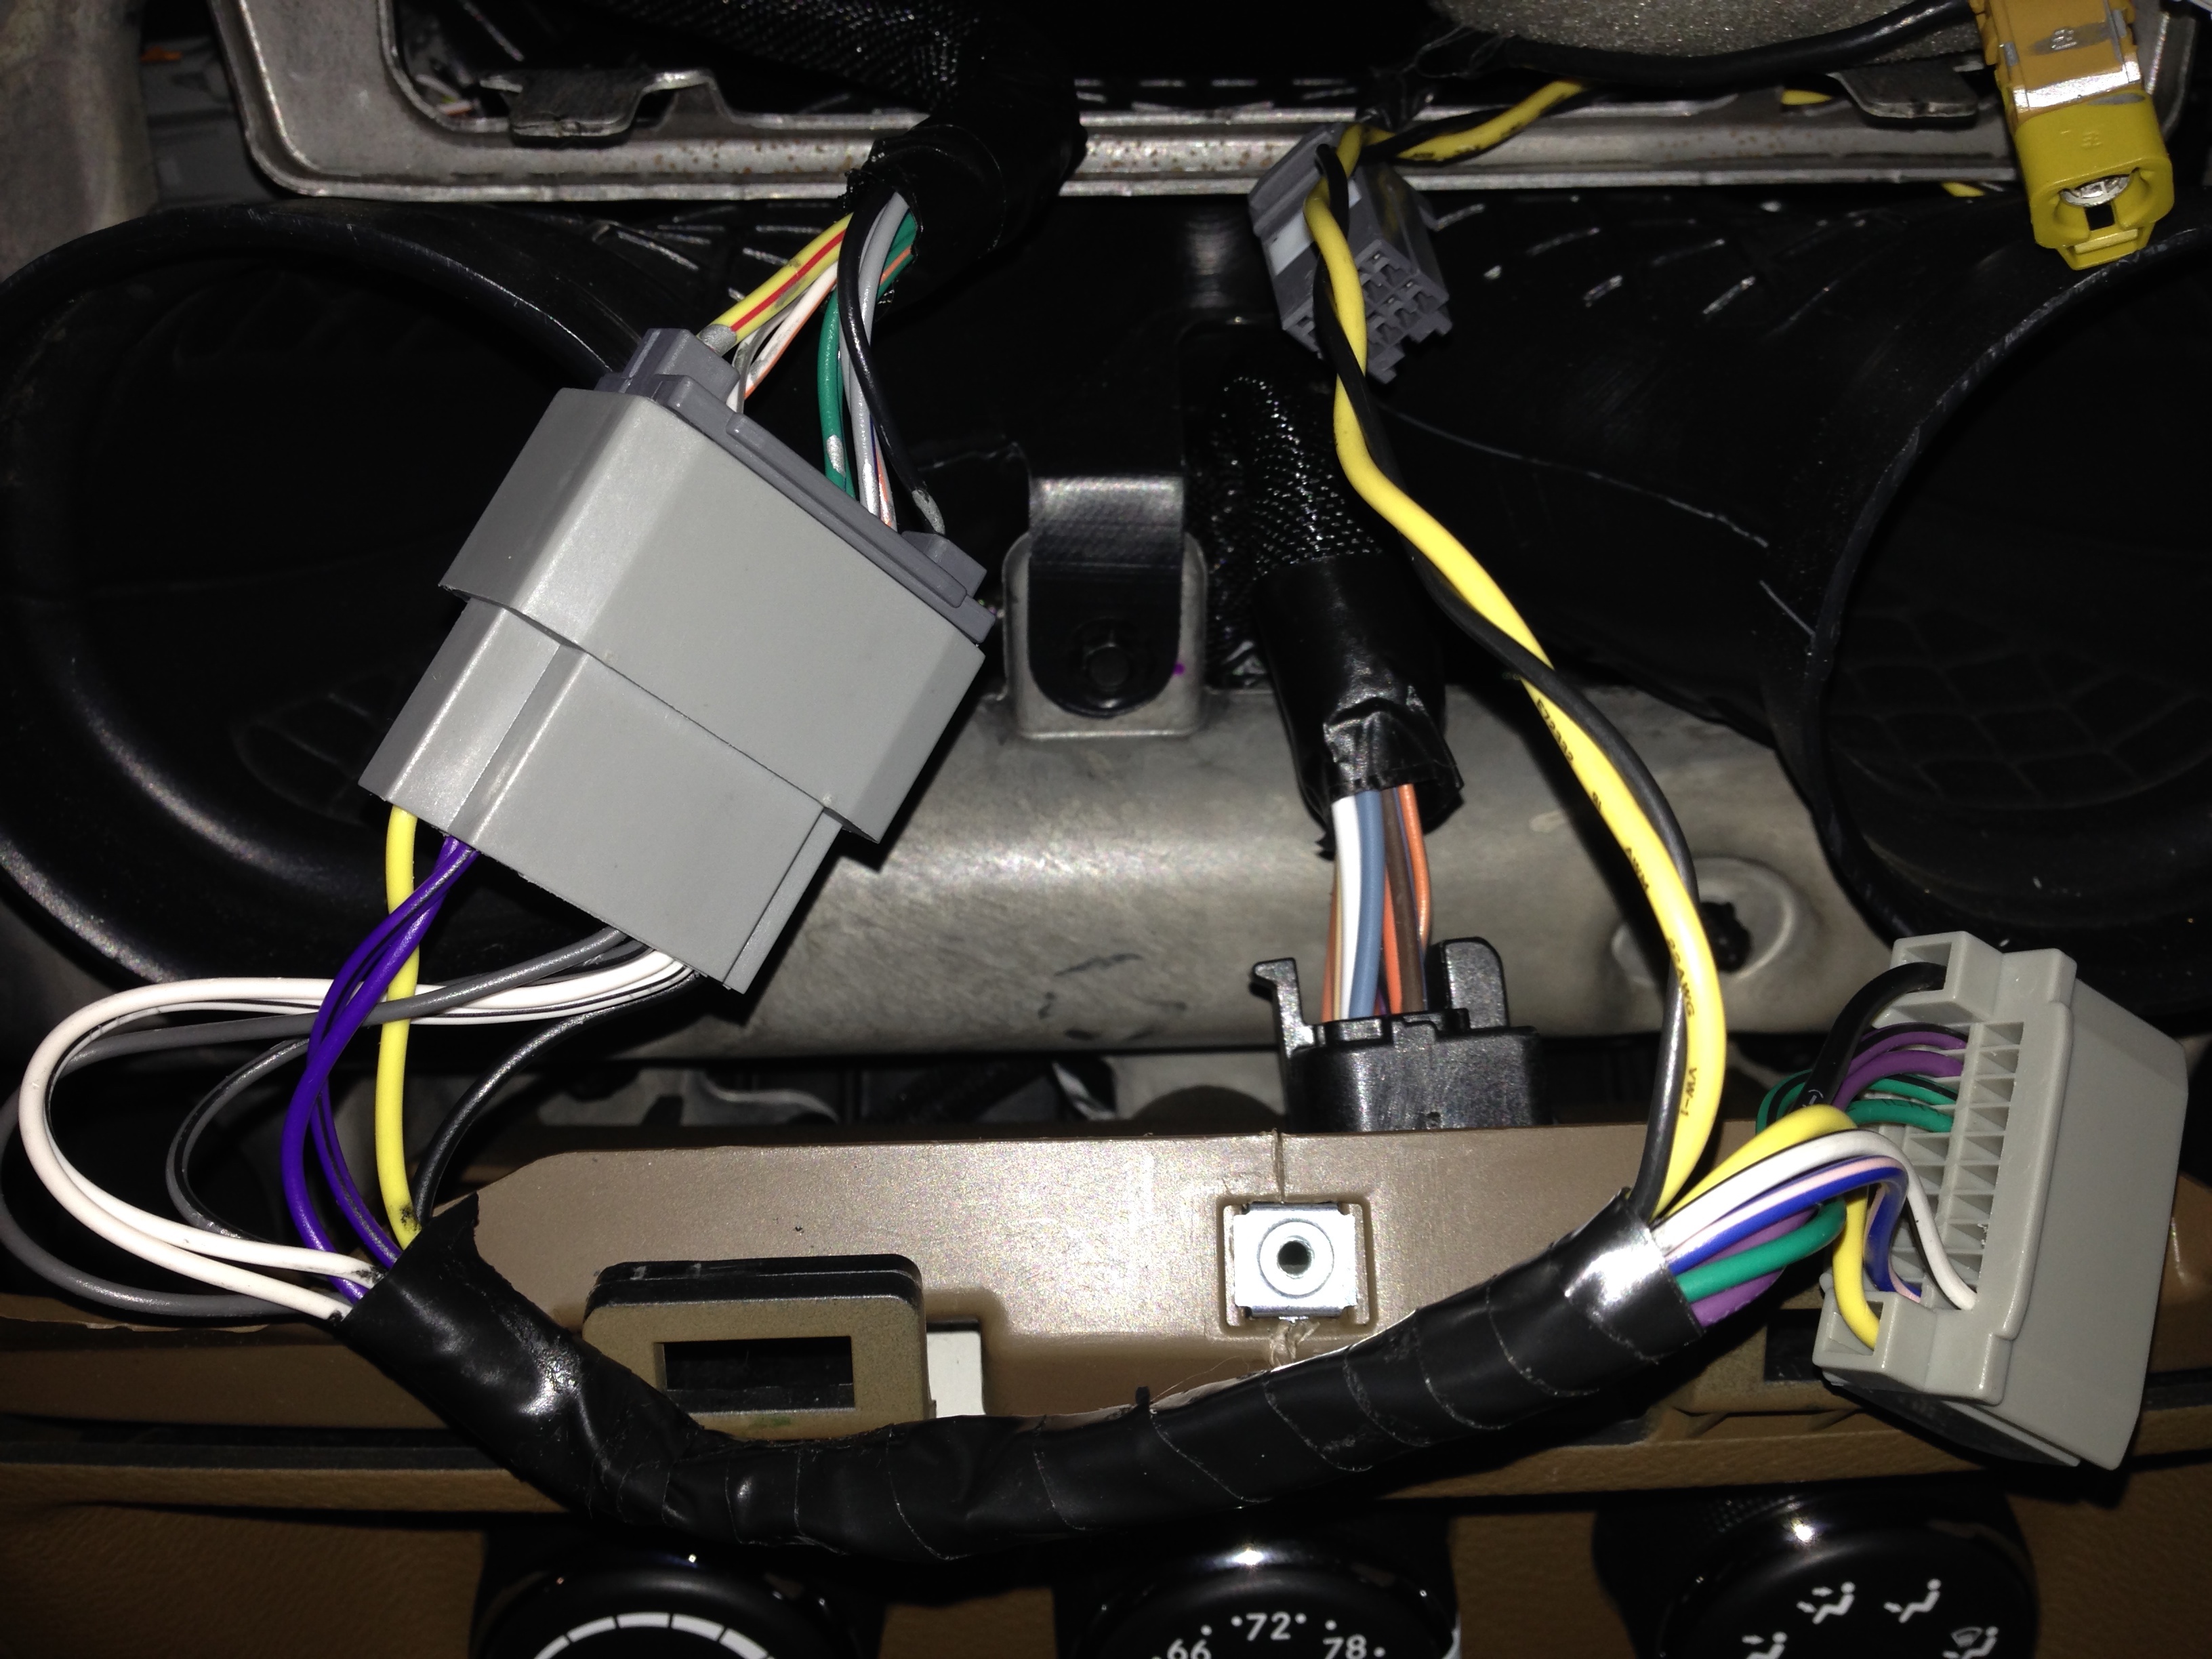 Custom Wiring Harness using the Radio C2 Connector
The easiest way to access the CAN-interior bus is the radio C2 harness.I built a pigtail wiring harness by buying a couple of aftermarket radio wiring harnesses, linking them together, and splicing in a pair of wires for the CAN-H and CAN-L connectors. By making a custom pigtail like this I avoided having to alter any of the OEM wiring making for both easy removal and a lower risk of screwing up something.
I originally used an Arduino Uno micro-controller board and a CAN interface shield from SparkFun and SK Pang Electronics. This platform is a prototype for what I will eventually use as the final production solution for my projects, but I quickly found that analyzing and hacking the vehicle’s CAN-Interior bus was too tedious with that solution, for two primary reasons: a) I had to write code to test any hypothesis, and b) I had to be physically connected to the Arduino with my laptop, in the car, in the cold of winter.
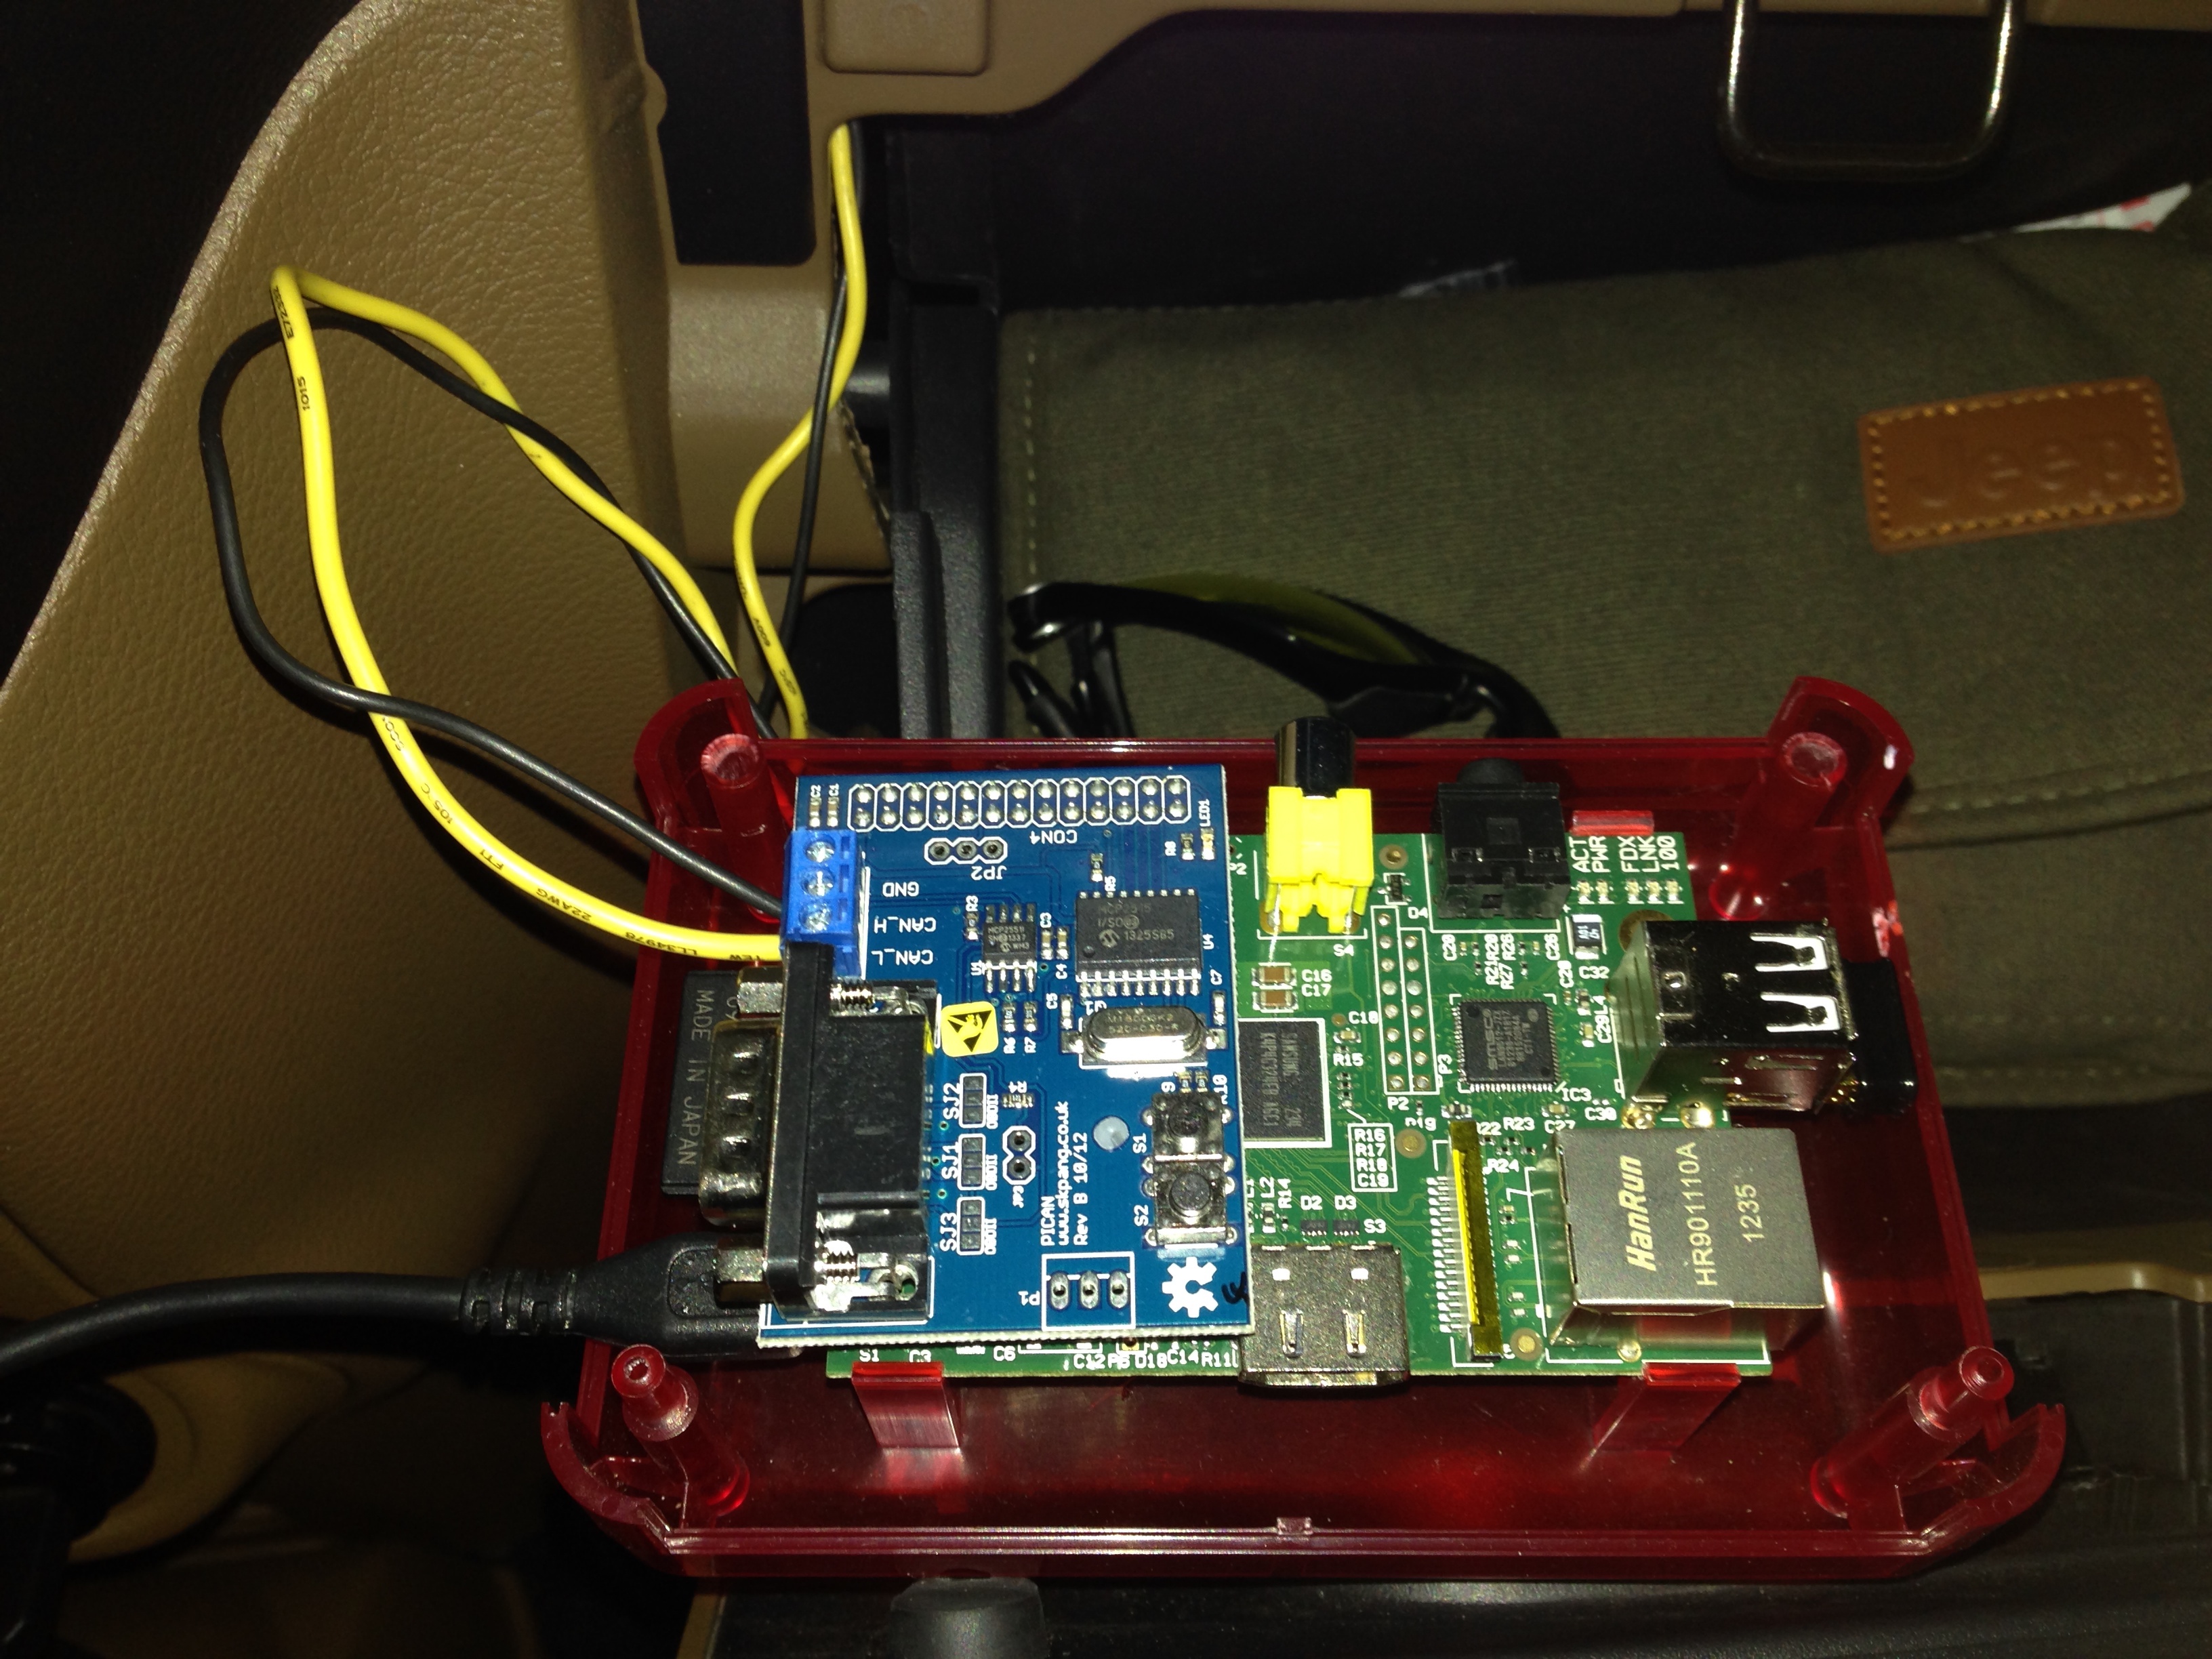 Raspberry Pi with CAN Interface Board
To solve both issues, I configured a Raspberry Pi system with a CAN interface board made specifically for it by SK Pang Electronics and aUSB WiFi dongle so I could leave the system in the vehicle and login to it from the comfort of my living room. Since the RPi is a temporary research solution only, I only placed into the glovebox, connected the CAN-H and CAN-L wires, and used a USB power supply directly from the vehicle’s 12v auxiliary power port.
Configuring the Raspberry Pi to communicate with the CAN Bus is unfortunately non-trivial, and I will cover that in another post.
What’s great about using Linux for CAN-bus hacking is the plethora of great tools available. The can-utils package in particular contains the command-line tools I used to analyze CAN bus messages and generate my own.
The very first thing to do is to look at the traffic on the bus using the
candump utility. This utility does exactly what it sounds like - dumps all
of the traffic it sees on the bus to your terminal or to a file. When I first
tried candump on the CAN-Interior bus of the Jeep, I started to see data
like this:
id:0x402 len:8 rtr:0 data:0xfe 0x02 0x3f 0xff 0xff 0xff 0xff 0xff
id:0x3e6 len:3 rtr:0 data:0x0b 0x11 0x1e
id:0x1e7 len:8 rtr:0 data:0x70 0x00 0x00 0x00 0x00 0x00 0x00 0x00
id:0x208 len:7 rtr:0 data:0x00 0x00 0x6d 0x5a 0x1e 0x01 0x2c
id:0x2d2 len:3 rtr:0 data:0x00 0x33 0x00
id:0x2dd len:4 rtr:0 data:0x05 0x00 0x00 0x00
id:0x2df len:8 rtr:0 data:0x10 0x04 0x03 0xe8 0x0f 0xa0 0x09 0xbf
id:0x286 len:6 rtr:0 data:0x03 0x38 0x00 0x00 0x00 0x00
id:0x348 len:8 rtr:0 data:0x00 0x00 0x00 0x00 0x00 0x00 0x00 0x00
id:0x2d2 len:3 rtr:0 data:0x00 0x33 0x00
id:0x2eb len:4 rtr:0 data:0x1e 0x00 0x64 0xee
id:0x2ce len:8 rtr:0 data:0xff 0xff 0x00 0x00 0x00 0x00 0x00 0x00
id:0x2b0 len:4 rtr:0 data:0x02 0x00 0x00 0x00
id:0x211 len:8 rtr:0 data:0xff 0xff 0xff 0xff 0xff 0xff 0xff 0xff
id:0x19f len:8 rtr:0 data:0x01 0xff 0x00 0xff 0xff 0xff 0xff 0x00
id:0x370 len:8 rtr:0 data:0x00 0x00 0x00 0x00 0x00 0x00 0x00 0x00
id:0x214 len:7 rtr:0 data:0x04 0x0d 0xba 0x00 0x14 0xb4 0x00
id:0x286 len:6 rtr:0 data:0x03 0x38 0xc0 0x00 0x00 0x00
id:0x2eb len:4 rtr:0 data:0x1e 0x00 0x64 0xef
id:0x2ce len:8 rtr:0 data:0xff 0xff 0x00 0x00 0x00 0x00 0x00 0x00
id:0x211 len:8 rtr:0 data:0xff 0xff 0xff 0xff 0xff 0xff 0xff 0xff
What a mess! That amount of data flashed across the screen in less than a
quarter second and began to repeat in long cycles. It was very difficult to
look at such a stream of data and detect when changes occurred based upon user
action. Luckily, the can-utils package includes another awesome tool called
cansniffer that can help with that very problem.
When you run cansniffer, it looks at the traffic for specific message ids
and begins to filter out repeating messages that do not change. After a few
seconds of startup time, the Jeep is left with the following changing data
while in accessory mode:
214 04 12 70 00 13 11 00 ..p....
217 63 78 07 40 6b fd cx.@k.
219 01 47 35 43 4c 32 37 31 .G5CL271
3e6 00 0d 12 ...
It was clear from watching cansniffer what some of this data was.
Message Id $219 is the vehicle identification number repeated over and over.
The first byte of the message is the message #, $00 through $04 with the
VIN split across each.
Message Id $3e6 is a clock of the hours, minutes and seconds since the
vehicle was turned on.
I was then able to operate switches in the vehicle and discover the following messages in short order:
244 81 00 39 C3 80 # Driver's door open, byte 0
244 80 00 39 C3 80 # Driver's door closed, byte 0
208 01 22 6d 5a 1e 01 2c # Left blinker on, byte 0
208 00 22 6d 6a 1e 01 2c # Left blinker off, byte 0
208 02 22 6d 5a 1e 01 2c # Right blinker on, byte 0
208 00 22 6d 6a 1e 01 2c # Right blinker off, byte 0
1e1 00 00 10 65 00 00 00 00 # Steering wheel position, bytes 3 & 4
2e0 00 01 47 21 ff ff 0c # Brake pedal depressed, byte 4
2e0 00 01 47 20 ff ff 0c # Brake pedal released, byte 4
2e7 84 1c 00 00 00 00 87 # Parking brake on, byte 0
2e7 04 1c 00 00 00 00 87 # Parking brake off, byte 0
292 00 49 33 00 00 48 28 # Throttle pressed, byte 3
2a8 00 01 00 00 00 00 # Windshield wipers, byte 3
2e5 03 # Rear wiper
2d2 01 06 00 # 4WD-HI
2d2 04 04 00 # 4WD-LO
2d2 00 03 00 # 2WD
Some of the data in each message is immediately apparent and others will take some more analysis to figure out what each byte represents. I was particularly surprised to see that the steering wheel movement t generated any data at all on the CAN-Interior bus.
Some actions result in multiple messages being generated. In particular, the
lights appear to generate two message id’s when state is changed, one to two
with id $208 and another with id $2e1. Here’s what I’ve found so far:
208 00 22 6d 5a 1e 01 2c # Lights on w/ fogs
208 58 22 6d 51 1e 01 2c
2e1 1a

208 00 22 6d 5a 1e 01 2c # Lights off w/ fogs
2e1 1b

2e1 1b # Fogs on
2e1 0b # Fogs off
2e1 0a # Lights on w/o fogs
2e1 0b # Lights off w/o fogs

The Radio generates a lot of data, too:
29e 00 03 97 20 02 ff ff ff # Change to FM 91.9`
291 09 01 05 30 f0 00 07 # Change to satellite, w/ no signal
293 00 00 b8 20 02 ff ff ff
291 01 01 05 10 10 00 07 # Change to FM, 91.5
291 00 03 93 20 02 ff ff ff
291 09 01 05 30 80 00 07 # Change satellite stations
293 00 00 19 23 02 ff ff ff
295 43 65 73 52 65 77 6e 64 # ClsRewnd
29e 00 00 0f 21 02 00 00 00 # Change CD tracks, byte 3
3d9 0a 0a 0a 0a 0a ff # Change volume, byte 0
3d9 08 0a 0a 0a 0a ff # Change volume, byte 0
```
Message id $295 is the most fun, as any message broadcast with that id will
appear on the vehicle’s EVIC message line, assuming you have disabled the ECO
option from being displayed.
Stay tuned for more information about the bus, how to setup both the Arduino and Raspberry Pi to talk to a CAN bus, and details about upcoming projects.
Resources
- TE Connectivity makes the MULTILOCK connector’s used by Mopar for the Radio C2 wiring harness: http://www.te.com/catalog/pn/en/1438759-1?RQPN=1438759-1
- SK Pang makes CAN interface boards for use with both the Raspberry Pi and Arduino platforms: http://skpang.co.uk/catalog/pican-canbus-board-for-raspberry-pi-p-1196.html and http://skpang.co.uk/catalog/arduino-canbus-shield-with-usd-card-holder-p-706.html
- SparkFun is a Boulder-based company that also sells the CAN-Bus Shield for Arduino: https://www.sparkfun.com/products/10039
- Microchip makes the MCP2515 CAN controller IC, and the MCP2551 CAN transceiver IC, low-cost chips for interfacing with CAN busses.
- Arduino makes low-cost embedded platforms using ATMEL micro-controllers, using open-source and open-hardware licenses.
- Raspberry Pimakes low-cost embedded platforms using ARM CPUs that run Linux, using open-source and open-hardware licenses.